一般来说使用GpuSkinning 已经能得到很不错的性能了,那么能不能再快一点呢?
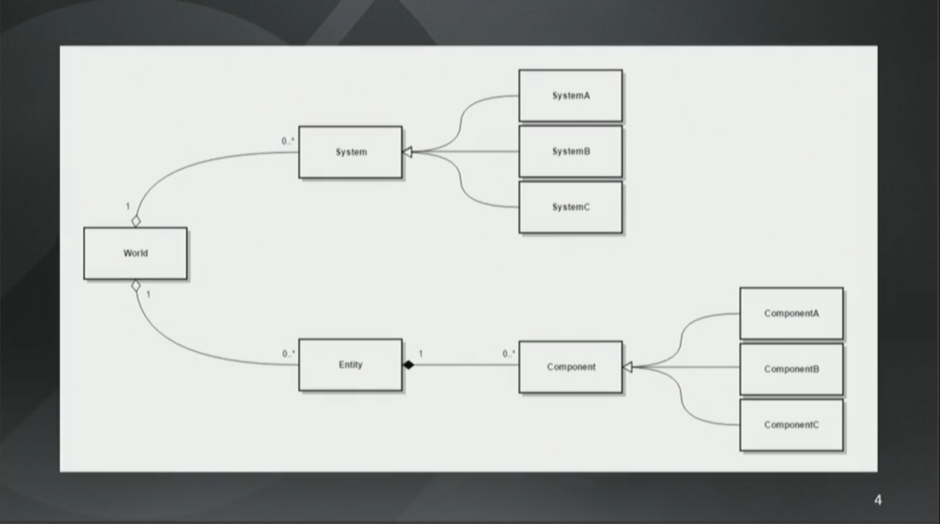
答案当然是肯定的,这一次我们来使用ECS榨干CPU的部分
先上性能对比图
1万个蒙皮角色,每个角色472面,带有uv0,uv1
测试设备硬件 win10, Intel i7-7700, GPU GTX-1060 6G
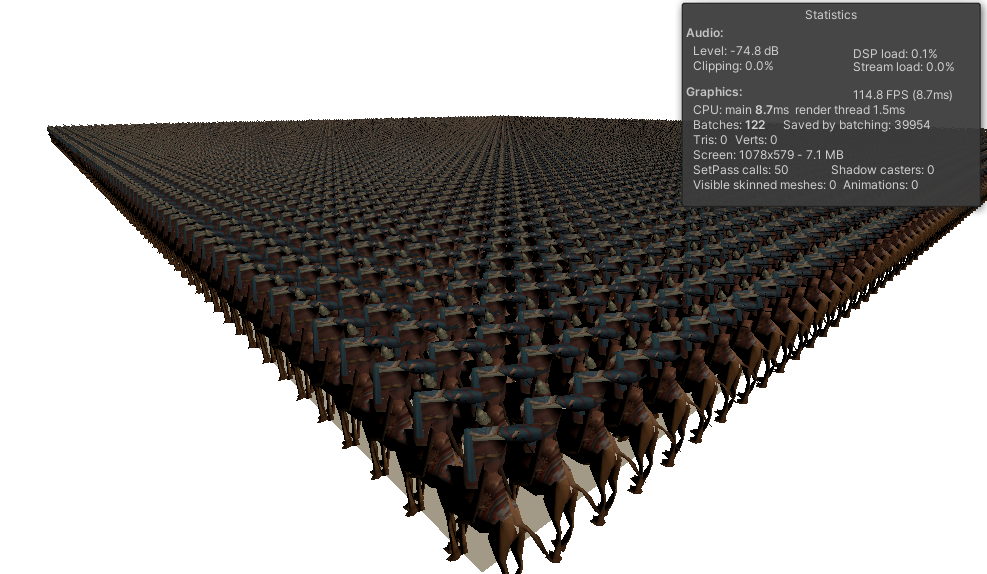

可以看到Entity的帧数在 110帧以上, 而传统GPUSkinning 的帧数在 29帧
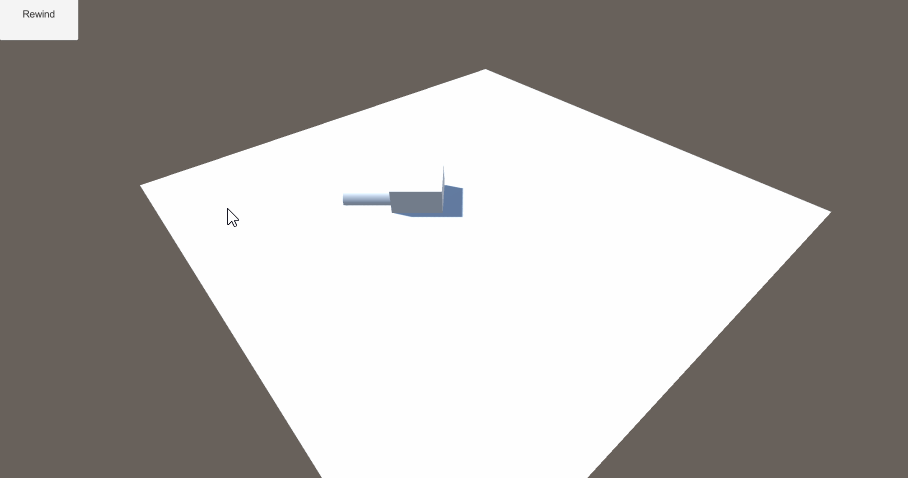
这个Demo使用的GPU蒙皮方案为 将骨骼矩阵数据以双四元数的方式存储在纹理上,具体实现方法不是这个Demo的重点,大家也可以参考这篇文章
GPU Skinning 加速骨骼动画
https://github.com/chengkehan/GPUSkinning
接下来一步一步开始分解这个Demo
首先实现Shader Include
Skinning.hlsl
#ifndef __AOI_GPUSKINNING

#define __AOI_GPUSKINNING
TEXTURE2D(_AnimTex);
SAMPLER(sampler_AnimTex);
inline float2 BoneIndexToTexUV(float index, float4 param) {
int row = (int)(index / param.y);
int col = index % param.x;
return float2(col * param.w, row * param.w);
}
inline float3 QuatMulPos(float4 rotation, float3 rhs)
{
float3 qVec = half3(rotation.xyz);
float3 c1 = cross(qVec, rhs);
float3 c2 = cross(qVec, c1);
return rhs + 2 * (c1 * rotation.w + c2);
}
inline float3 QuatMulPos(float4 real, float4 dual, float4 rhs) {
return dual.xyz * rhs.w + QuatMulPos(real, rhs.xyz);
}
inline float4 DQTexSkinning(float4 vertex, float4 texcoord, float4 startData, Texture2D
int index1 = startData.z + texcoord.x;
float4 boneDataReal1 = SAMPLE_TEXTURE2D_LOD(animTex, animTexSample, BoneIndexToTexUV(index1, startData), 0);
float4 boneDataDual1 = SAMPLE_TEXTURE2D_LOD(animTex, animTexSample, BoneIndexToTexUV(index1 + 1, startData), 0);
float4 real1 = boneDataReal1.rgba;
float4 dual1 = boneDataDual1.rgba;
int index2 = startData.z + texcoord.z;
float4 boneDataReal2 = SAMPLE_TEXTURE2D_LOD(animTex, animTexSample, BoneIndexToTexUV(index2, startData), 0);
float4 boneDataDual2 = SAMPLE_TEXTURE2D_LOD(animTex, animTexSample, BoneIndexToTexUV(index2 + 1, startData), 0);
float4 real2 = boneDataReal2.rgba;
float4 dual2 = boneDataDual2.rgba;
float3 position = (dual1.xyz * vertex.w) + QuatMulPos(real1, vertex.xyz);
float4 t0 = float4(position, vertex.w);
position = (dual2.xyz * vertex.w) + QuatMulPos(real2, vertex.xyz);
float4 t1 = float4(position, vertex.w);
return t0 * texcoord.y + t1 * texcoord.w;
}
inline void SkinningTex_float(float4 positionOS, float4 texcoord, float4 frameData, Texture2D
output = float4(DQTexSkinning(positionOS, texcoord, frameData, animTex, animTexSample).xyz,1);
}
#endif